As I explained in my previous article about working with metal clays, I switched to working with bronze rather than silver because this metal is way more affordable. This is then perfect to experiment with bigger objects, the limit of my creativity being the size of my kiln.
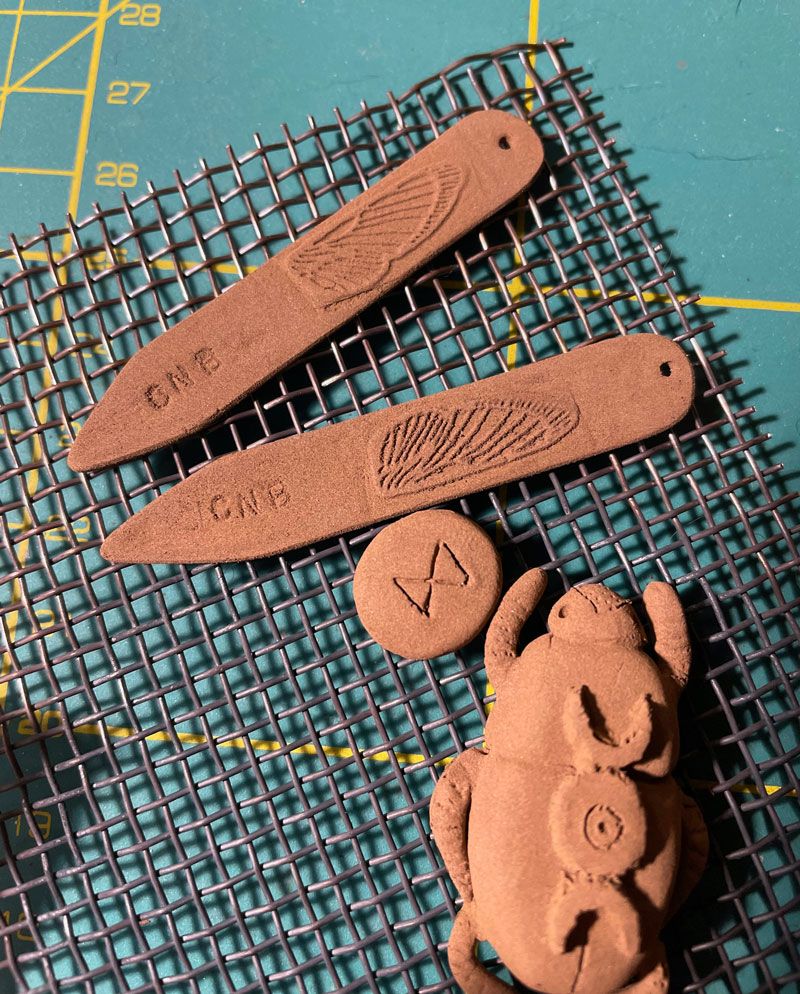
When it comes to art, I really like to draw insects because they have interesting shapes and colours. So when I decided to experiment with bronze figurines, I thought it would be interesting to have a look at bugs and beetles for inspiration. Here is the process for the handmade beetle I crafted earlier this year, and the few challenges I went through before being able to finalize this project.
The process
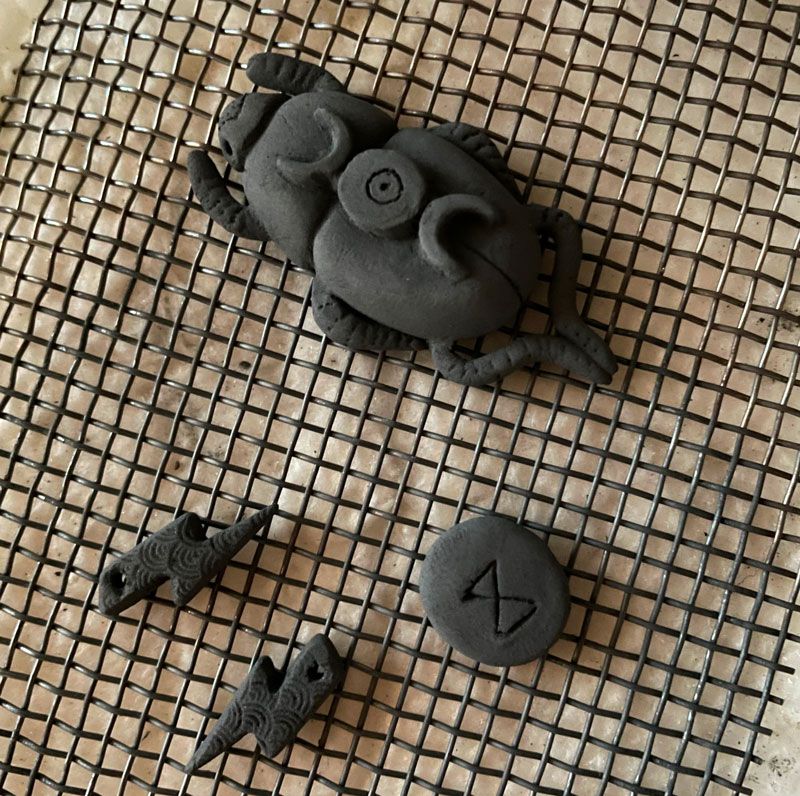
I use a bronze clay which is processed in a powder format, so I first have to humidify the powder until I obtain a texture of clay that makes it easy to model. When I'm working with metal clays, I'm usually making several objects during the same session so I don't end up with too much humidified clay that will be harder to preserve compared to powder.
Once the objects are done, I let them dry completely for a few days. This step is very important because humidity can create bubbles that may explode during the cooking and create holes or irregularities. The beetle being quite thick, I let it dry for several weeks to be sure the figurine wouldn't have any humidity in its core. I then polished it with metal files and sand paper to correct the shapes where needed and make it as smooth as possible. The more you work your clay at that step, the less work you'll have to do later, when the piece will be cooked. Dried clay is way easier to work compared to solid metal.
When I'm satisfied with my dried pieces, I start the cooking process. For bronze clay, two firings at different temperatures are necessary. The first one, at about 500°C (932°F) burns the organic binder that keeps the metal powder together in a state of clay. It gives a very distinctive black color to the pieces :
I wait for the pieces to cool down - to avoid a thermal shock that could weaken them - and prepare for the second firing by putting as many pieces as I can in an inox container with active charcoal, to minimise the number of firings I'll have to do :
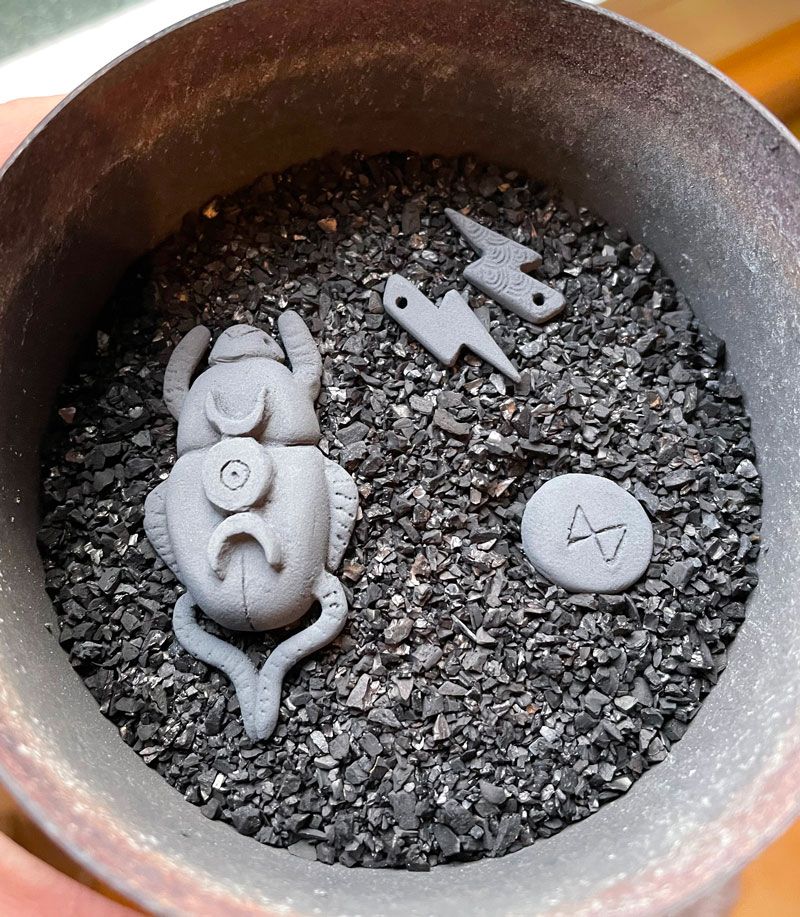
The second firing is made at a higher temperature that will depend on the clay's brand and kiln's characteristics. For the type of bronze clay I use that comes from the French manufacturer Meteor Clay, I bake the pieces at 830°C (1526°F) for 30 minutes after burying them in active charcoal. Because my kiln takes about 30mn to reach that temperature, the entire firing actually lasts an hour. The power of my kiln going up to 700W, in terms of energy use, this is roughly the equivalent of letting a micro-wave working for an hour.
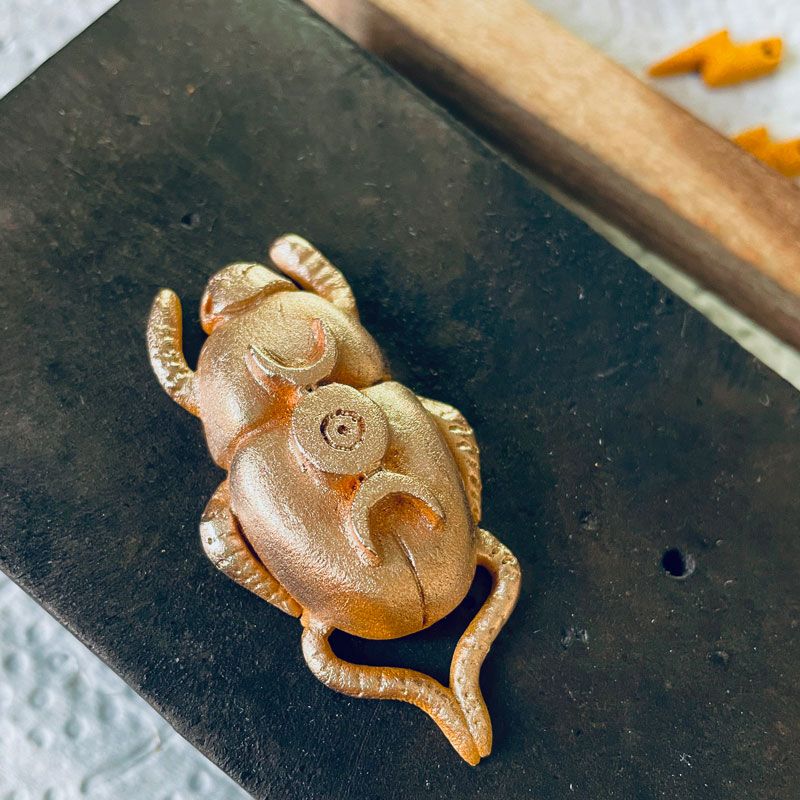
When the firing is finished, I let the pieces cool down in the container to prevent another thermal shock. This tends to create a lot of oxydation that translates by a thick orange layer covering the objects.
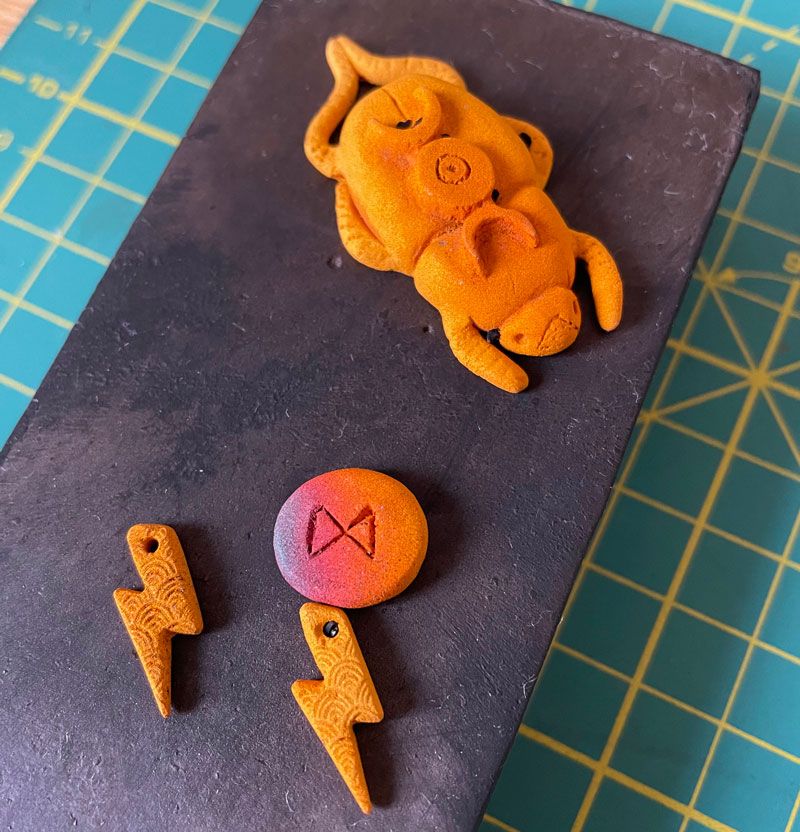
This oxydation can either be removed by brushing it energetically with a metal brush, or plunging the pieces into a deoxidising liquid for a few minutes. For the beetle, I didn't have any deoxidising liquid so I brushed it :
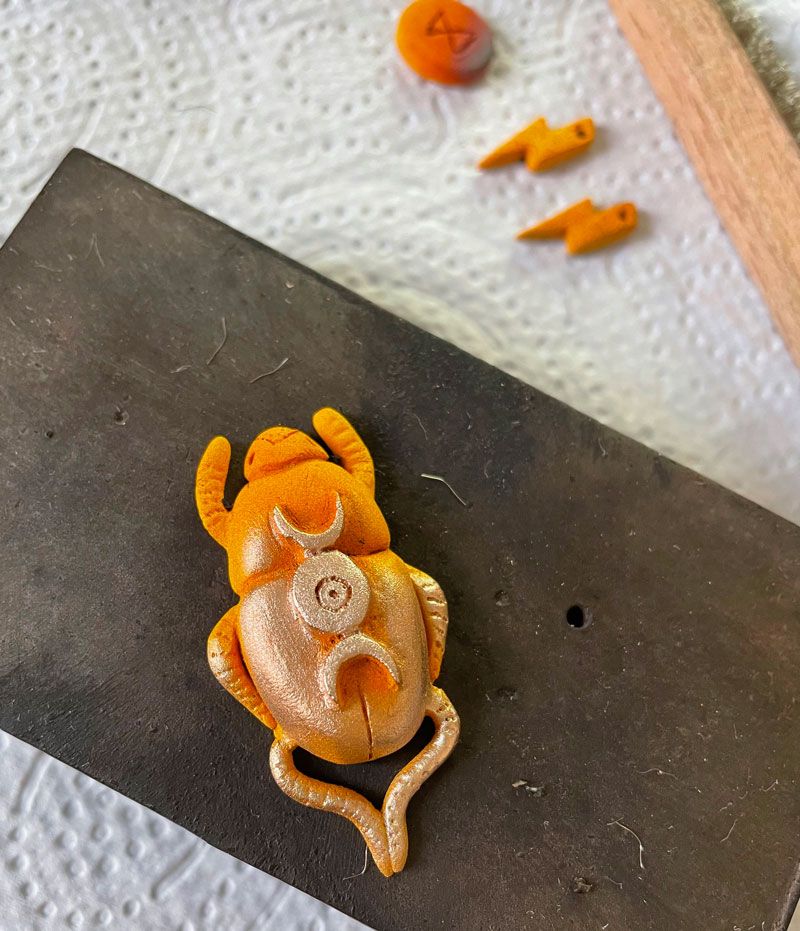
The next step consists in using different sizes of sand papers (from 600 to 3000) to polish the surface of the metal and make it shine. The more you brush, the duller it looks, and the more you polish, the shinier it becomes. You can use both techniques on the same piece to create interesting textures.
Unfortunately, at that point the back legs of my beetle broke :
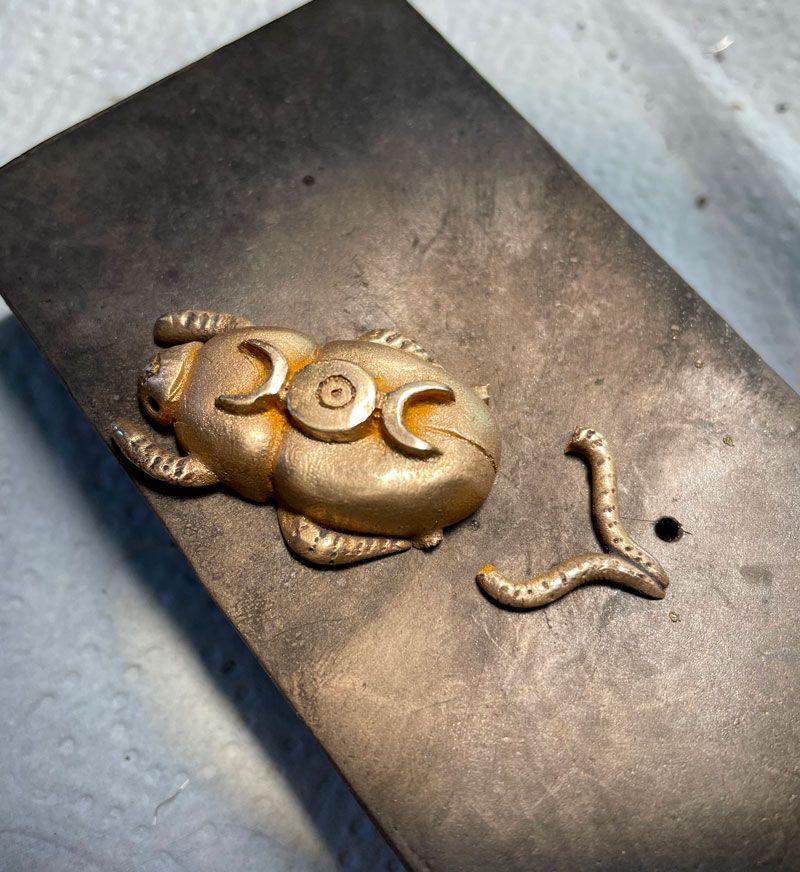
As you may see on the picture, the inside of the back legs looks a bit orange, what seemed to indicate that this bit wasn't fired properly and still contained uncooked clay inside. I was a bit at loss about what to do here, and I didn't know if I had to redo the figurine completely or if there was anything salvageable.
Thankfully, the manufacturer I mentioned earlier has a very friendly and reactive forum online (in French) and after I exposed my firing problem, I was provided with very detailed explanations and solutions. According to one of the founders of the brand, the clay might have been weakened during the firing because of the huge size difference between the body and the legs. Indeed, when cooked, metal clays have a shrinking in size that can be anywhere between 7% to 20%, depending on the brands. Smaller parts will shrink faster and in the case of my beetle, the fact that the back legs were attached probably put a lot of pressure during that shrinking phase.
The good news though is that it is absolutely possible to mix humid clay with cooked metal, use the fresh clay to repair broken parts and go through the entire firing process again. This will have no negative impact on the already fired parts as long as the temperature of the kiln doesn't exceed the melting point of the chosen metal - here bronze. I was recommended to increase the length of my firings for this piece as it is really thick, especially the length of the first cooking as it's really important that the organic binder burns completely at that point. Thanks to these advices, the second firing of the beetle was a success.
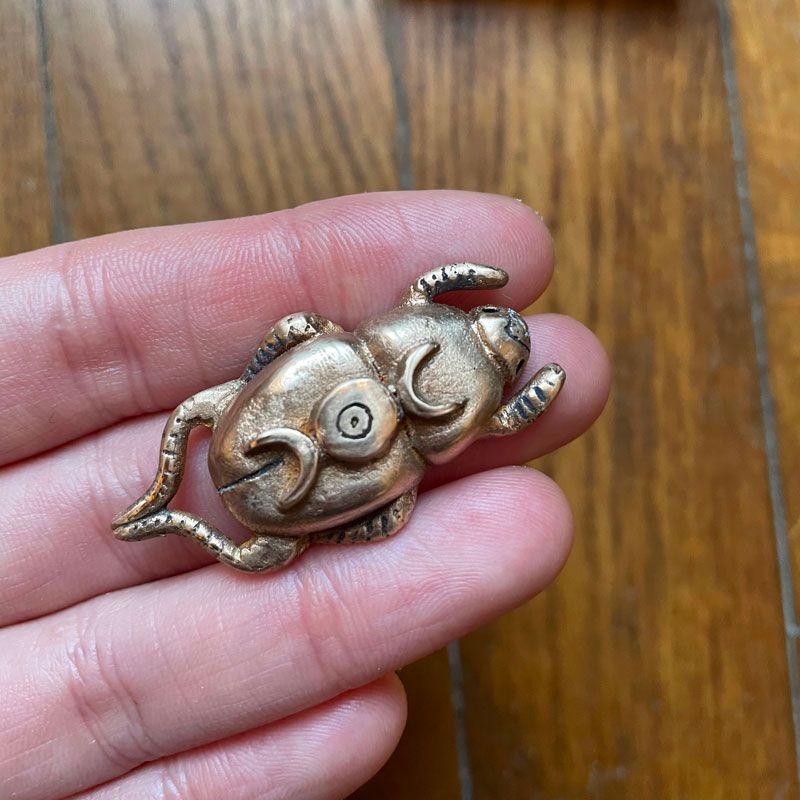
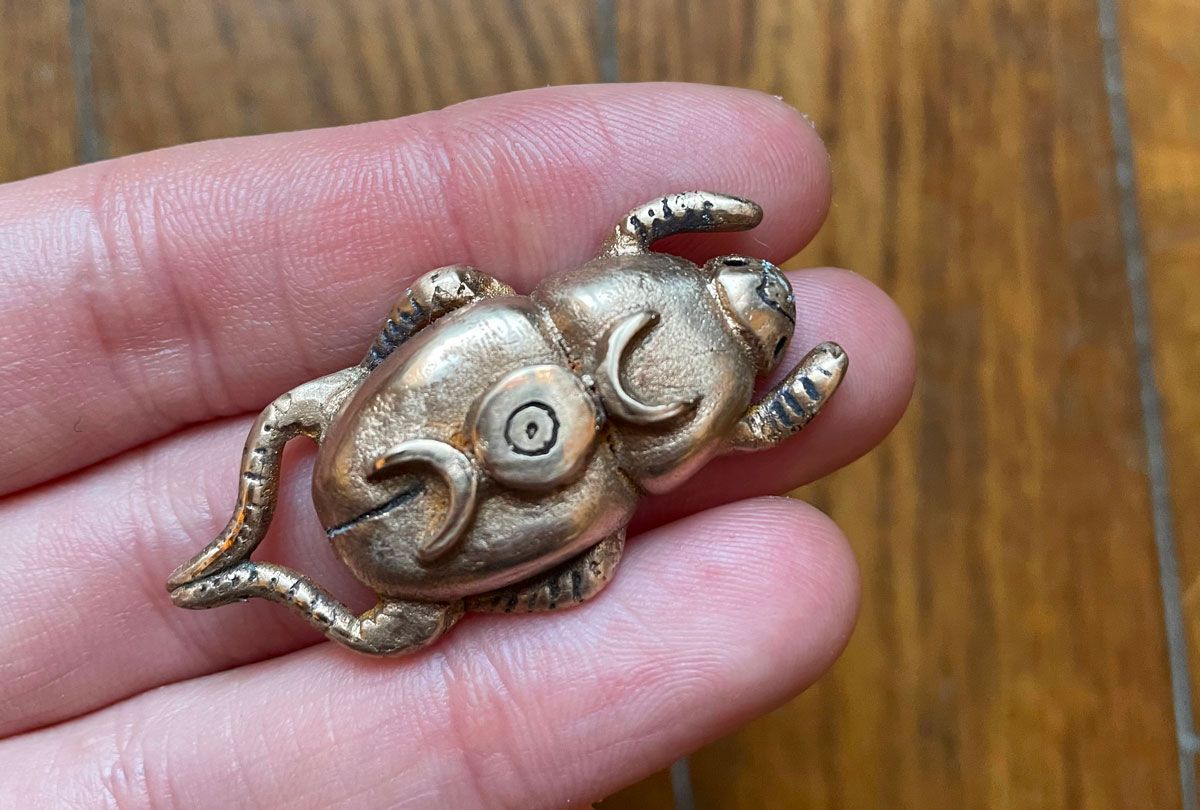
After that second firing I used a dark patina to highlight the carved drawings on the head, the back and the legs of the figurine. I was very happy with the end result.
This very cute bronze beetle then became a present for a family member, after being carefully packed in a small cardboard box :
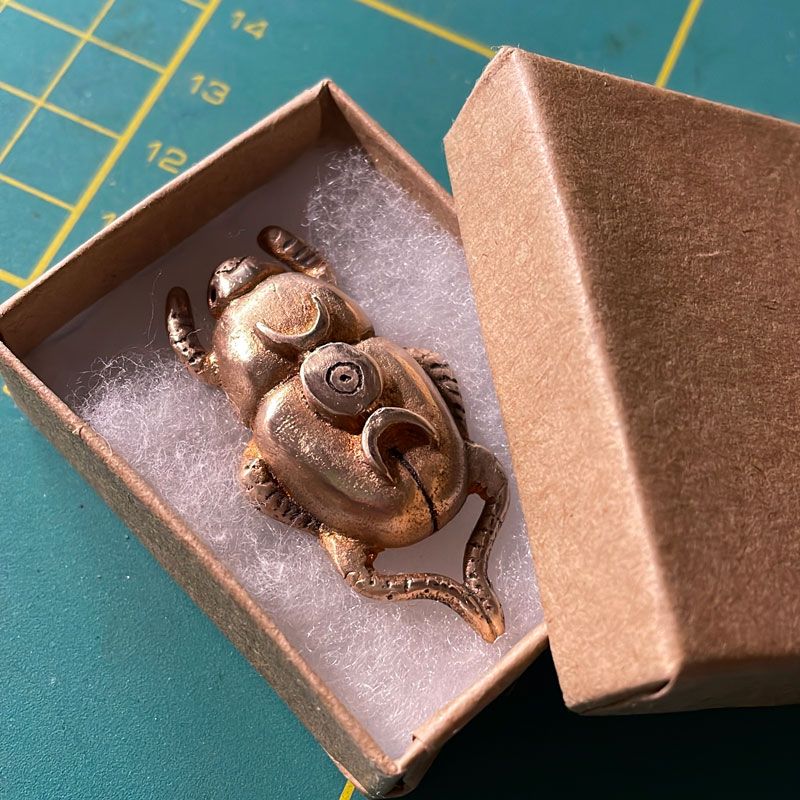
Thanks to its relative heaviness, I heard it is now used as a classy paperweight. I'm looking forward to making more bronze figurines and I'm curious to know how their future owners will use them !