About a decade ago, I had a friend who was teaching people how to create jewellery with silver clay. For those who have never heard about it, here is the definition given by the Jewellery School of Scotland :
Silver clay is a material, invented in the 1990s, made up of fine silver particles (usually recycled from the photographic industry and from X-rays), an organic binder and water.
The clay can be moulded, rolled, textured and shaped. We then leave it to dry, file and refine the piece before firing it with a butane torch (a creme brule torch will do!) or in a jewellery kiln. The resulting silver piece can then be polished ready to wear! The resulting silver is of hallmark quality.
As soon as I started working this material, I fell in love with the technique. I actually loved it so much that I got trained myself and I'm even a Certified Art Clay instructor since 2014!
The problem is that the price of silver kept increasing these last years. Also, it's very complicated to sell objects handmade with silver in France, as the legislation imposes so many legal and fiscal obligations that it isn't really worth doing it unless it's a full-time occupation.
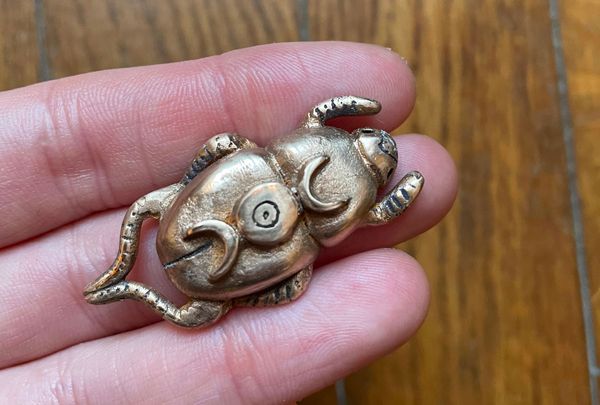
However, the good news is that silver clay belongs to a huge family of clays that can be made from every type of metal, including much cheaper ones like copper or bronze. These metal clays are a bit less easy to work with than silver clay, but their affordability makes them perfect to try and make bigger decorative objects and jewellery.
Last summer, I've introduced my family and friends to working with metal clays, and it was lovely seeing the astonishment on their face when the metal clay things they moulded became real metal after beeing baked in a small kiln at a very high temperature. Today I'm going to share the different necessary steps to create jewellery and tiny objects out of bronze clay.
How to work with bronze clay
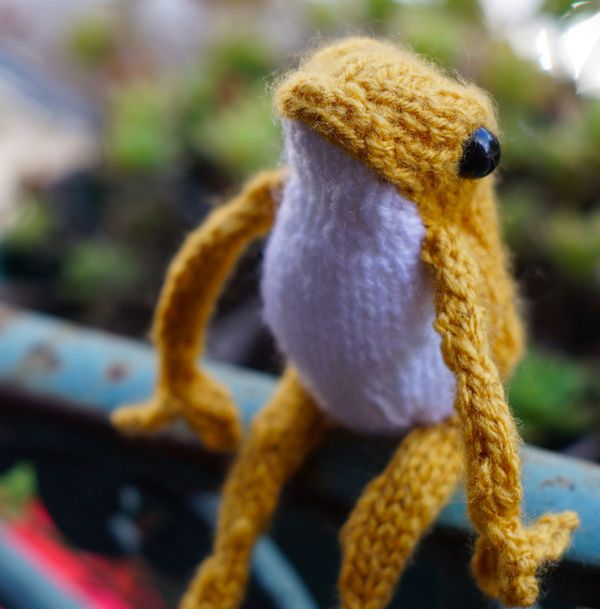
First, mould your figurines and/or jewellery and let them dry completely. When they're dry, you can work them again until they have the type of finish you want :

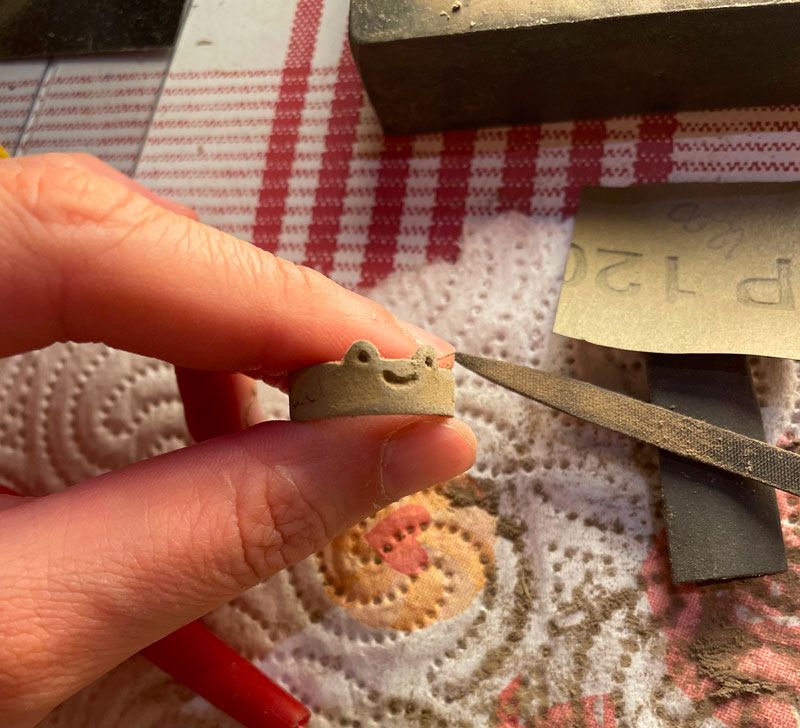
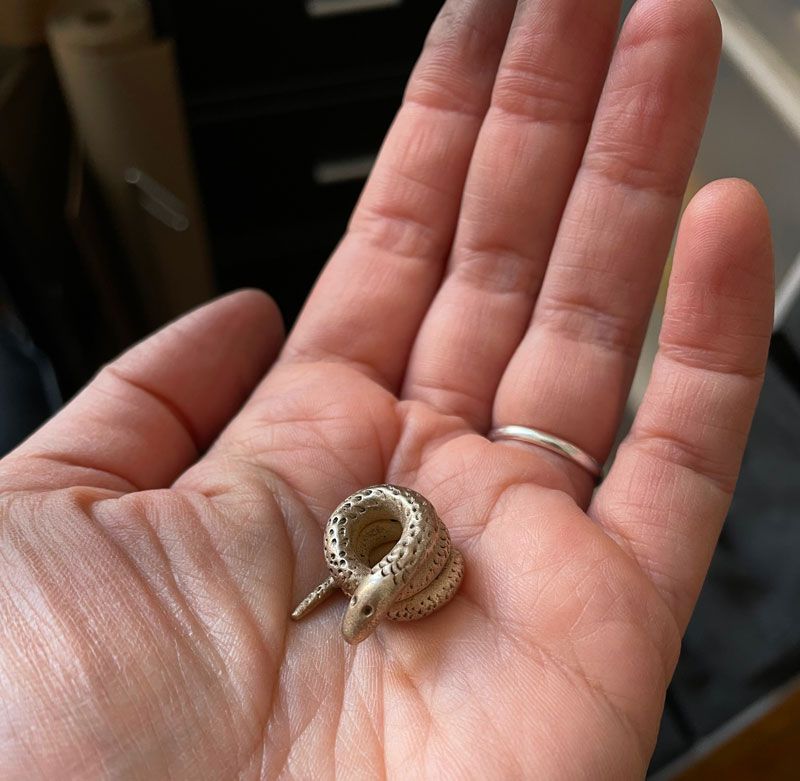
You have to keep in mind that all metal clays will reduce after baking, due to the organic binder and water evaporating during the cooking.
Bronze clay has to be cooked twice at very high temperatures. The first time at 500°C (932°F) to destroy the organic binder. It gives a very distinctive black color to the pieces :
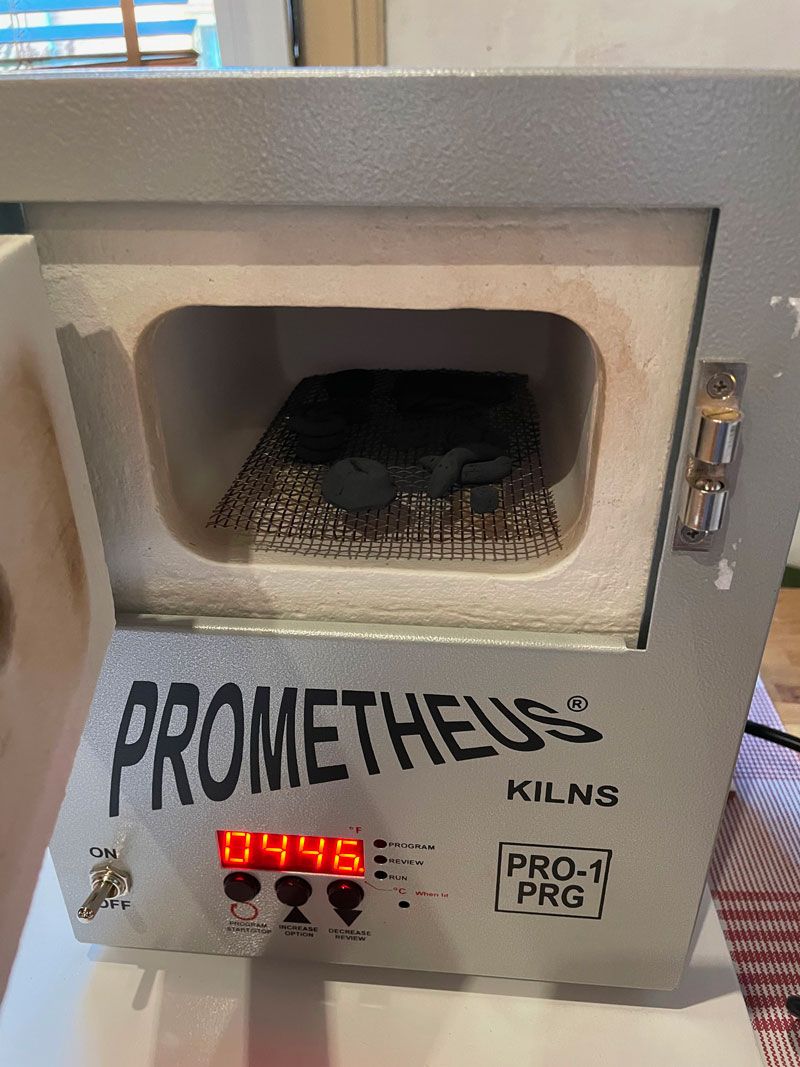
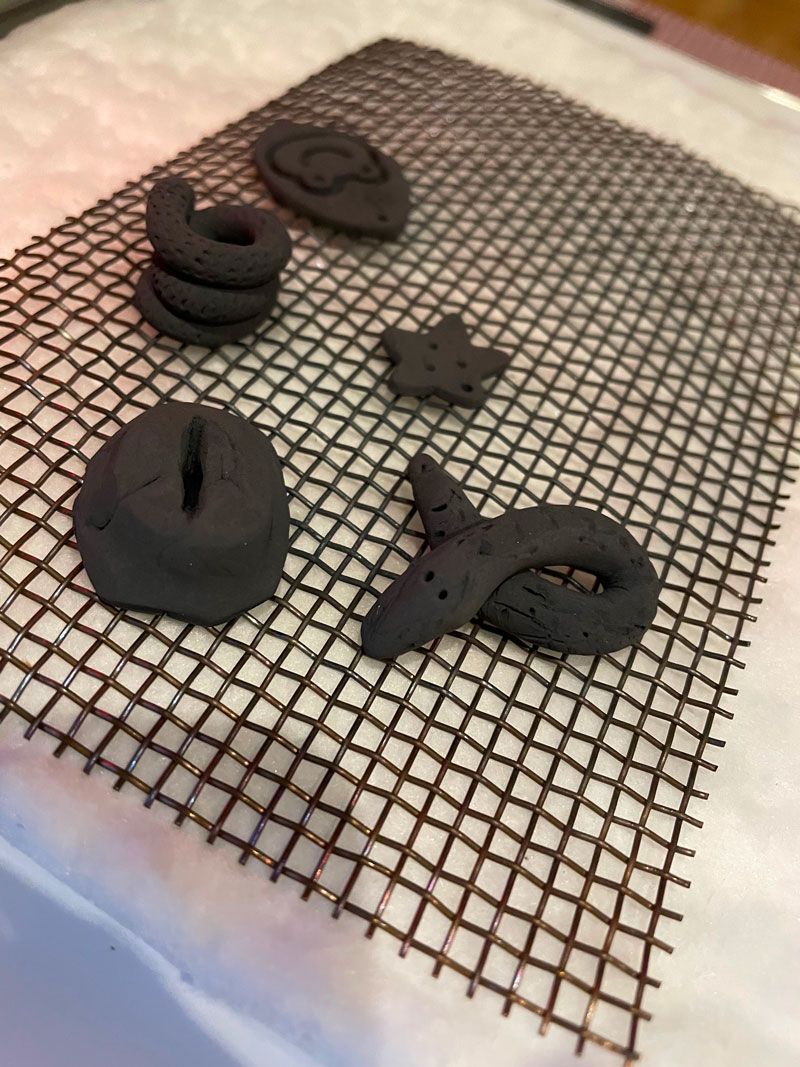
At this stage, the pieces have to be carefully handled as they can easily break.
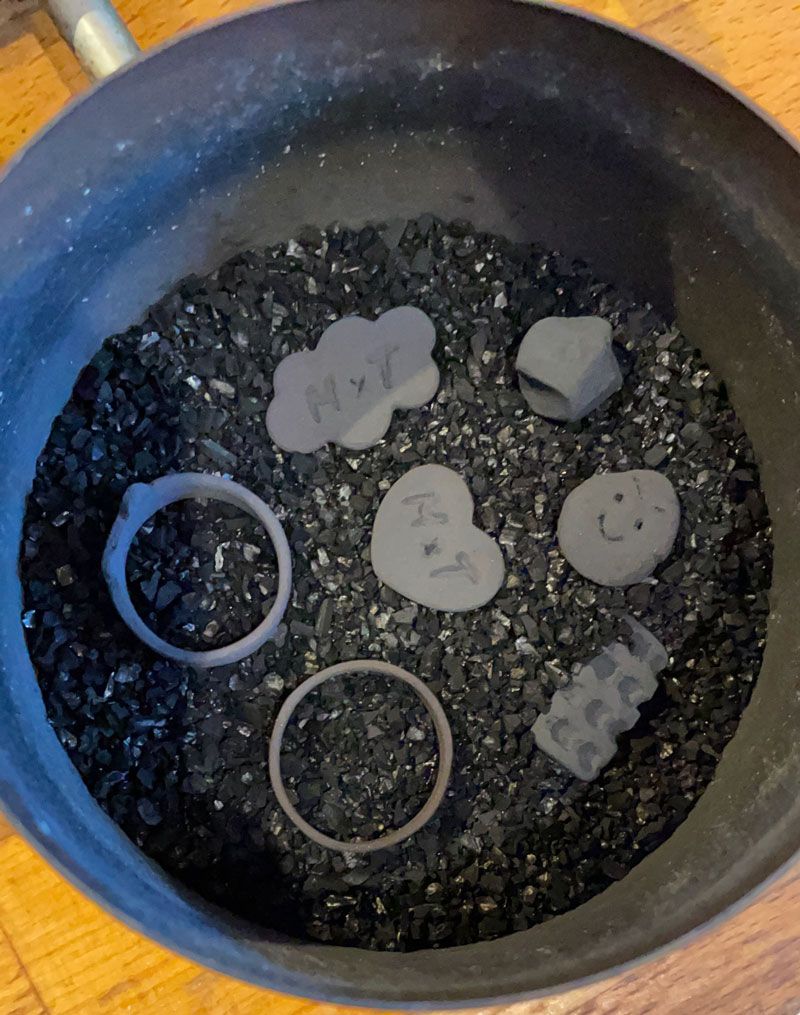
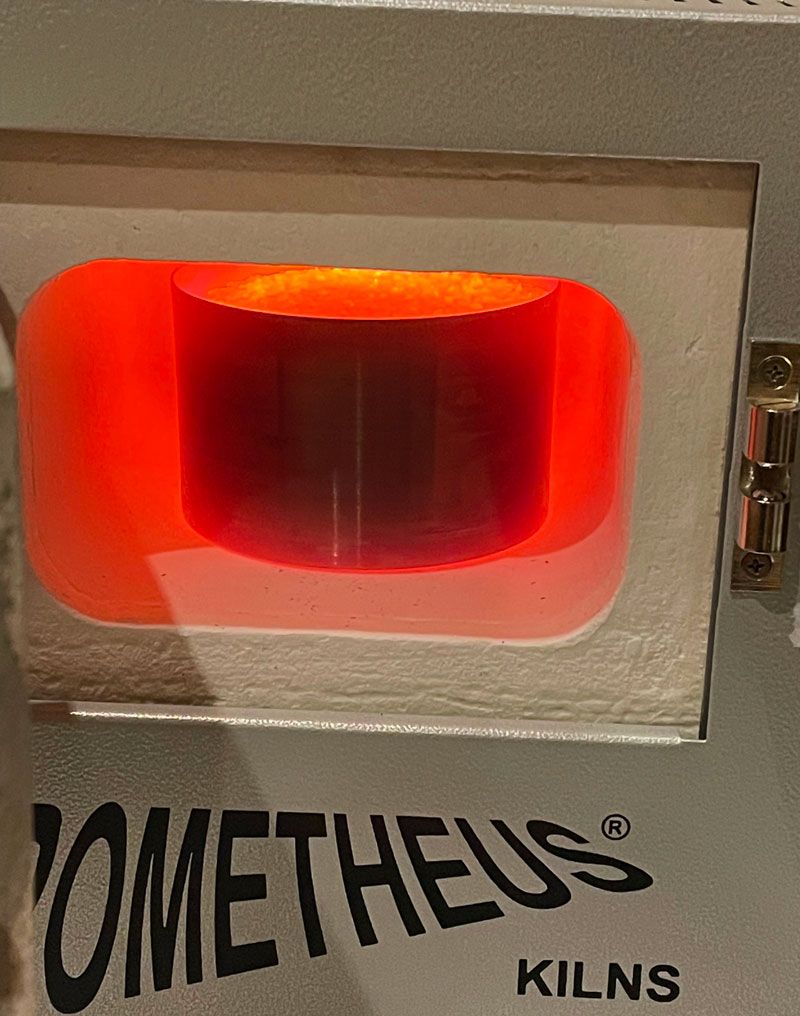
The second cooking has to be made at a higher temperature, that will usually depend on the brand of the clay. I baked these pieces at 830°C (1526°F) after burying them in active charcoal :

During the cooking, a veil is dropped off all over the pieces. When the kiln is being opened, oxydation happens too. It makes them look like biscuits!
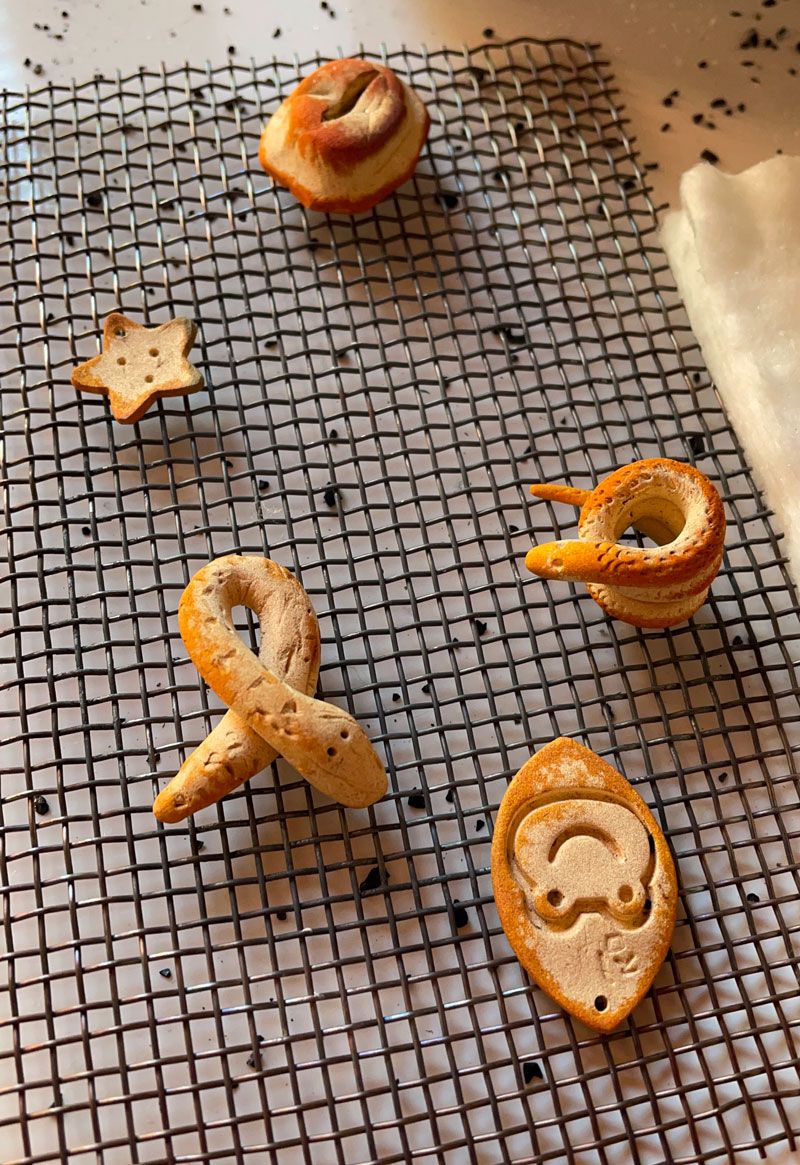
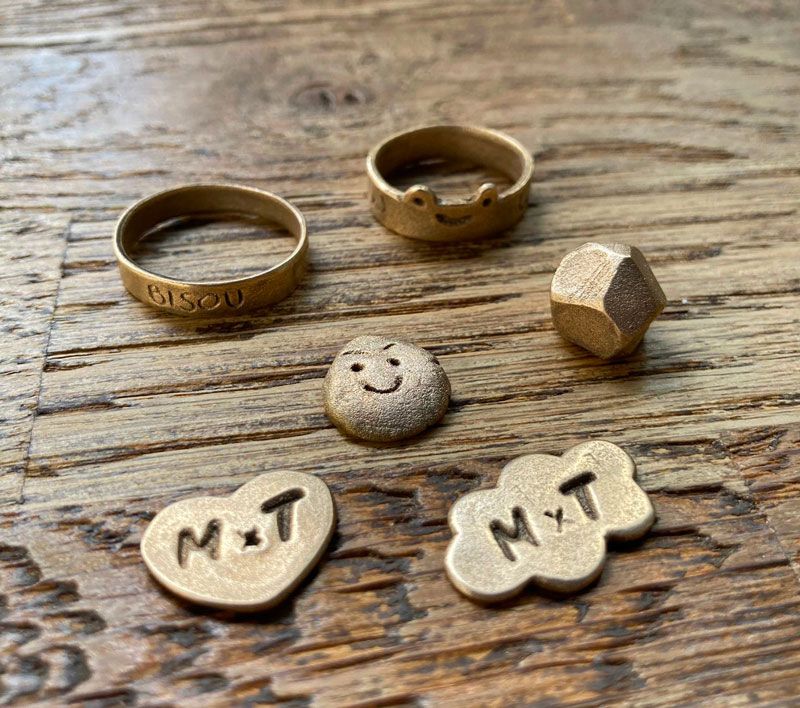
The pieces have then to be brushed strongly with special brushes :
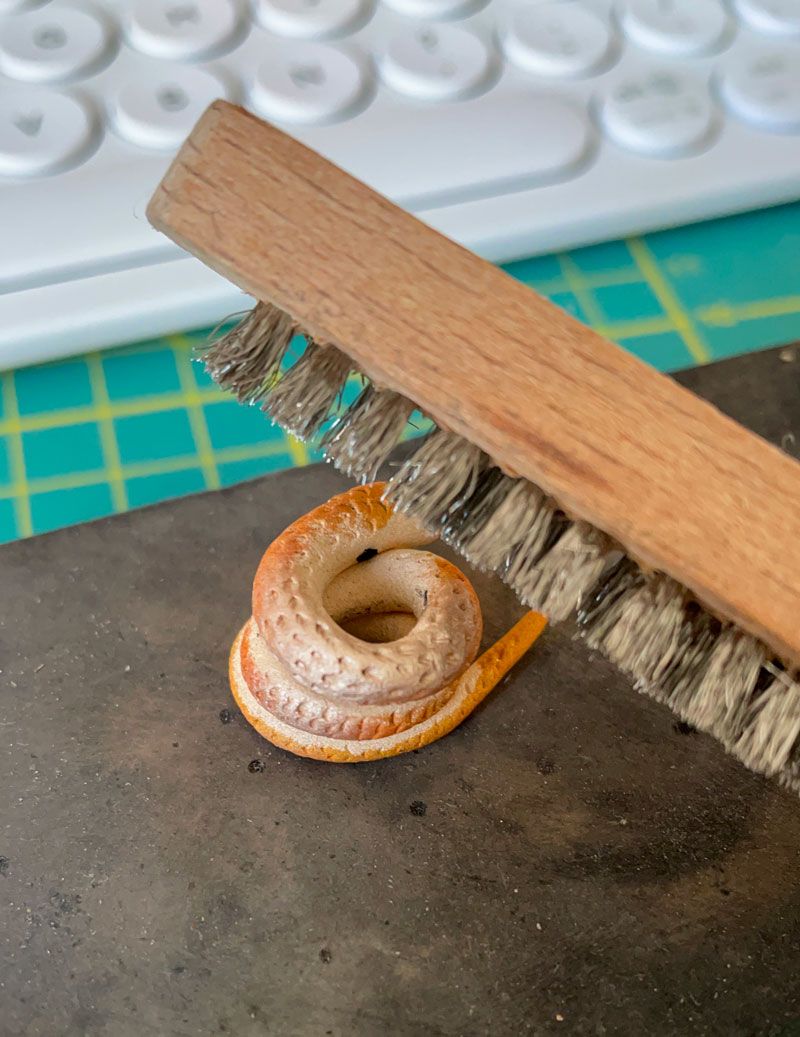
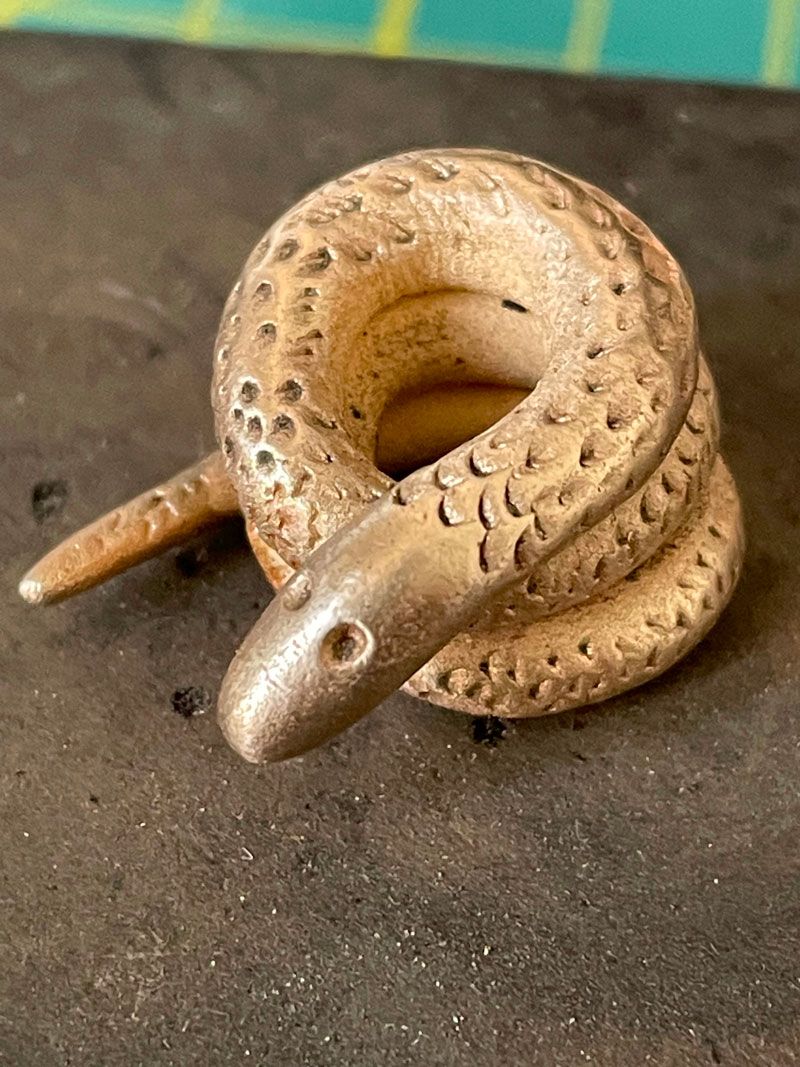
Once the oxydation layer is removed, the pieces really start to look like metal :
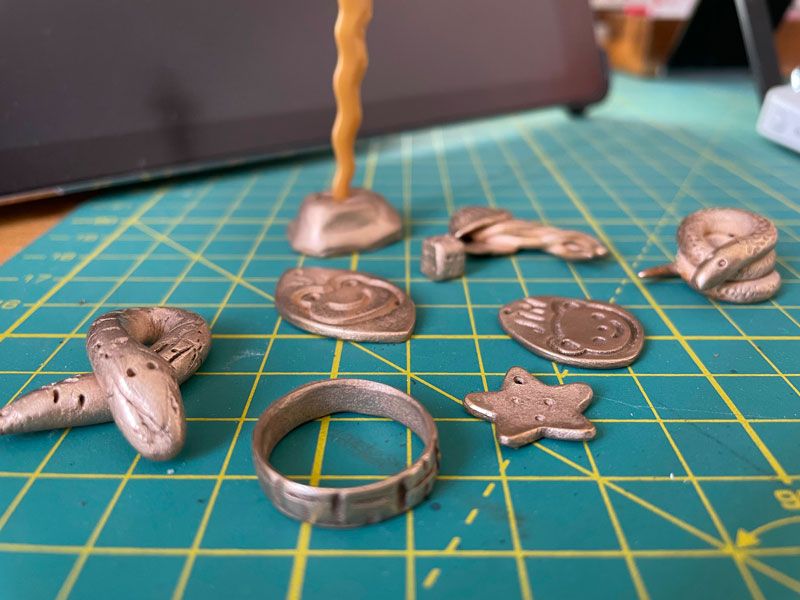
In a next post, I will show pieces and figurines that are more complex.